We have three different kinds of insulation in our project: blown-in cellulose, a small amount of spray foam and standard batts. Installation on all three is complete and, man oh man, does that feel good. So, what can be said about insulation? At risk of stating the obvious, insulation in our walls, roofs and floors accomplishes the critical task of insulating the interior living spaces from outside temperature swings. Ya know, cause sometime it gets really cold here. Like lows in the mid 40s! And the heat – oh the heat! Here on the coast it has been know to push up into the upper 80’s for over a week at a time! And all those days during the spring and fall with a high of 72 low of 65. Mercy!

Truth is we have a VERY forgiving climate here on the southern California coast. And yet, insulation or lack thereof does still have an impact on comfort levels and energy use. Certainly not to the same degree as, say, Michigan or Arizona, but an impact nonetheless.
Perhaps less obvious than moderating outside temperatures, the type of insulation specifications also have a huge impact on moderating outside and adjacent unit noise levels. We currently live in an apartment with little to no insulation between units. Speaking from first hand experience, I cannot emphasize enough how detrimental this condition is to maintaining high-quality living spaces within higher-density multi-family structures. (For the record, our current low-quality walls are greatly compensated for in the form of high-quality neighbors, but the point about the living space remains.)
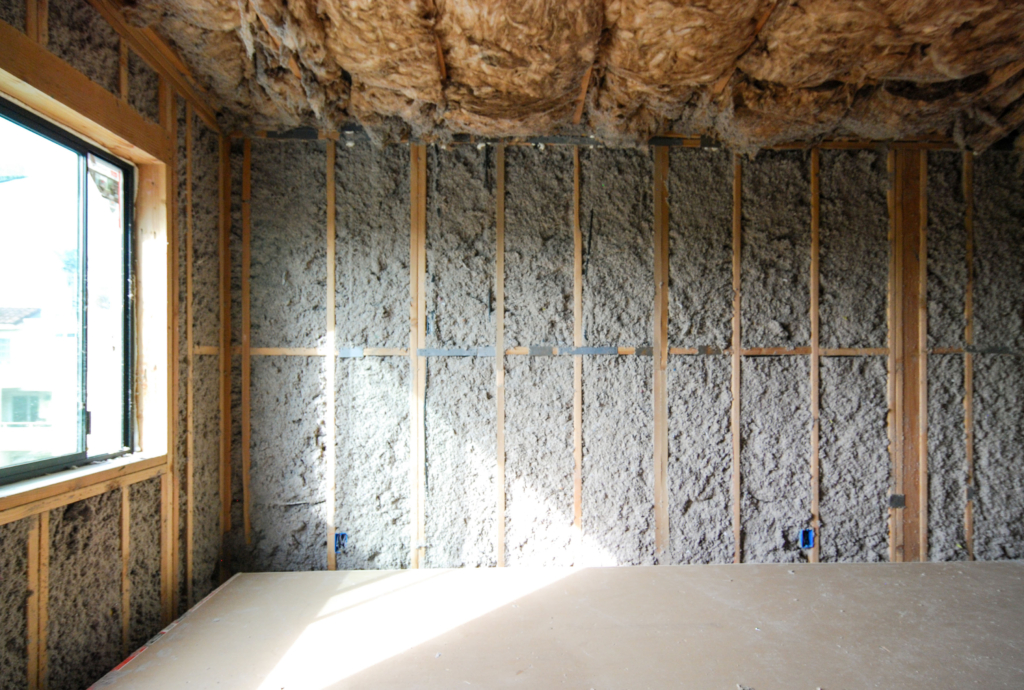
Blown-in CELLULOSE

Simply put, cellulose is shredded paper waste. It’s slightly more technical than that since the material has also been treated with borate as a fire retardant and termite deterrent. If money was no object I would have used this everywhere. The insulating properties (in particular the sound dampening) on this stuff is amazing. It runs roughly double the cost of standard batts, but the performance is worth it. We used the cellulose on all exterior walls, partition walls between dwelling units as well as select interior walls/floors where additional acoustic separation was desired.
The installation process is pretty interesting to watch. For exterior walls, building paper and/or exterior plywood serves as the backing for the material. When installing at interior walls and ceilings, netting is attached to hold the loose fill in place.

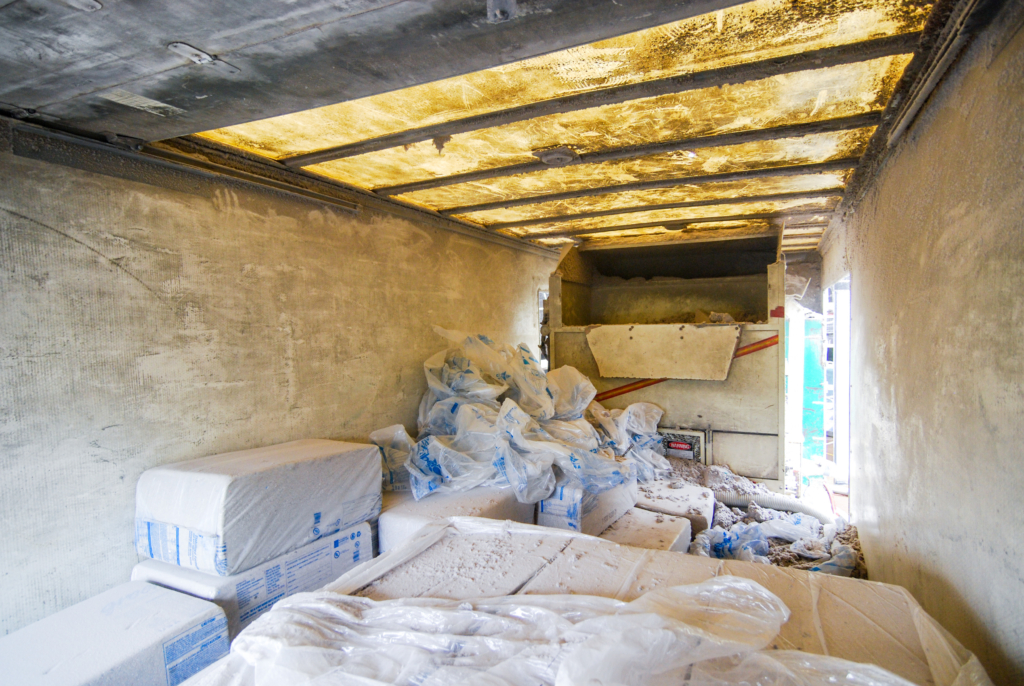
On installation day the blower truck arrives. Absolutely everything in the back of this truck is coated in cellulose.
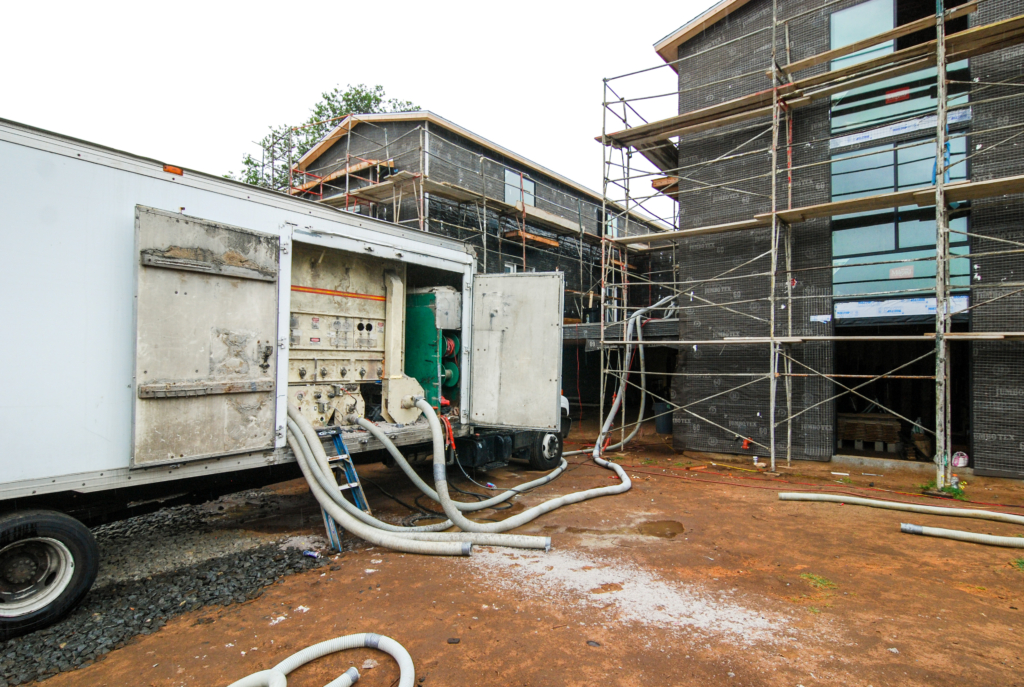

The first step in the process is to empty bags of cellulose into the bin where it gets fluffed and mixed to the proper moisture content.
The material in then routed through a hose to the point of installation. Below are a couple shots from the snow-globe scene during application.
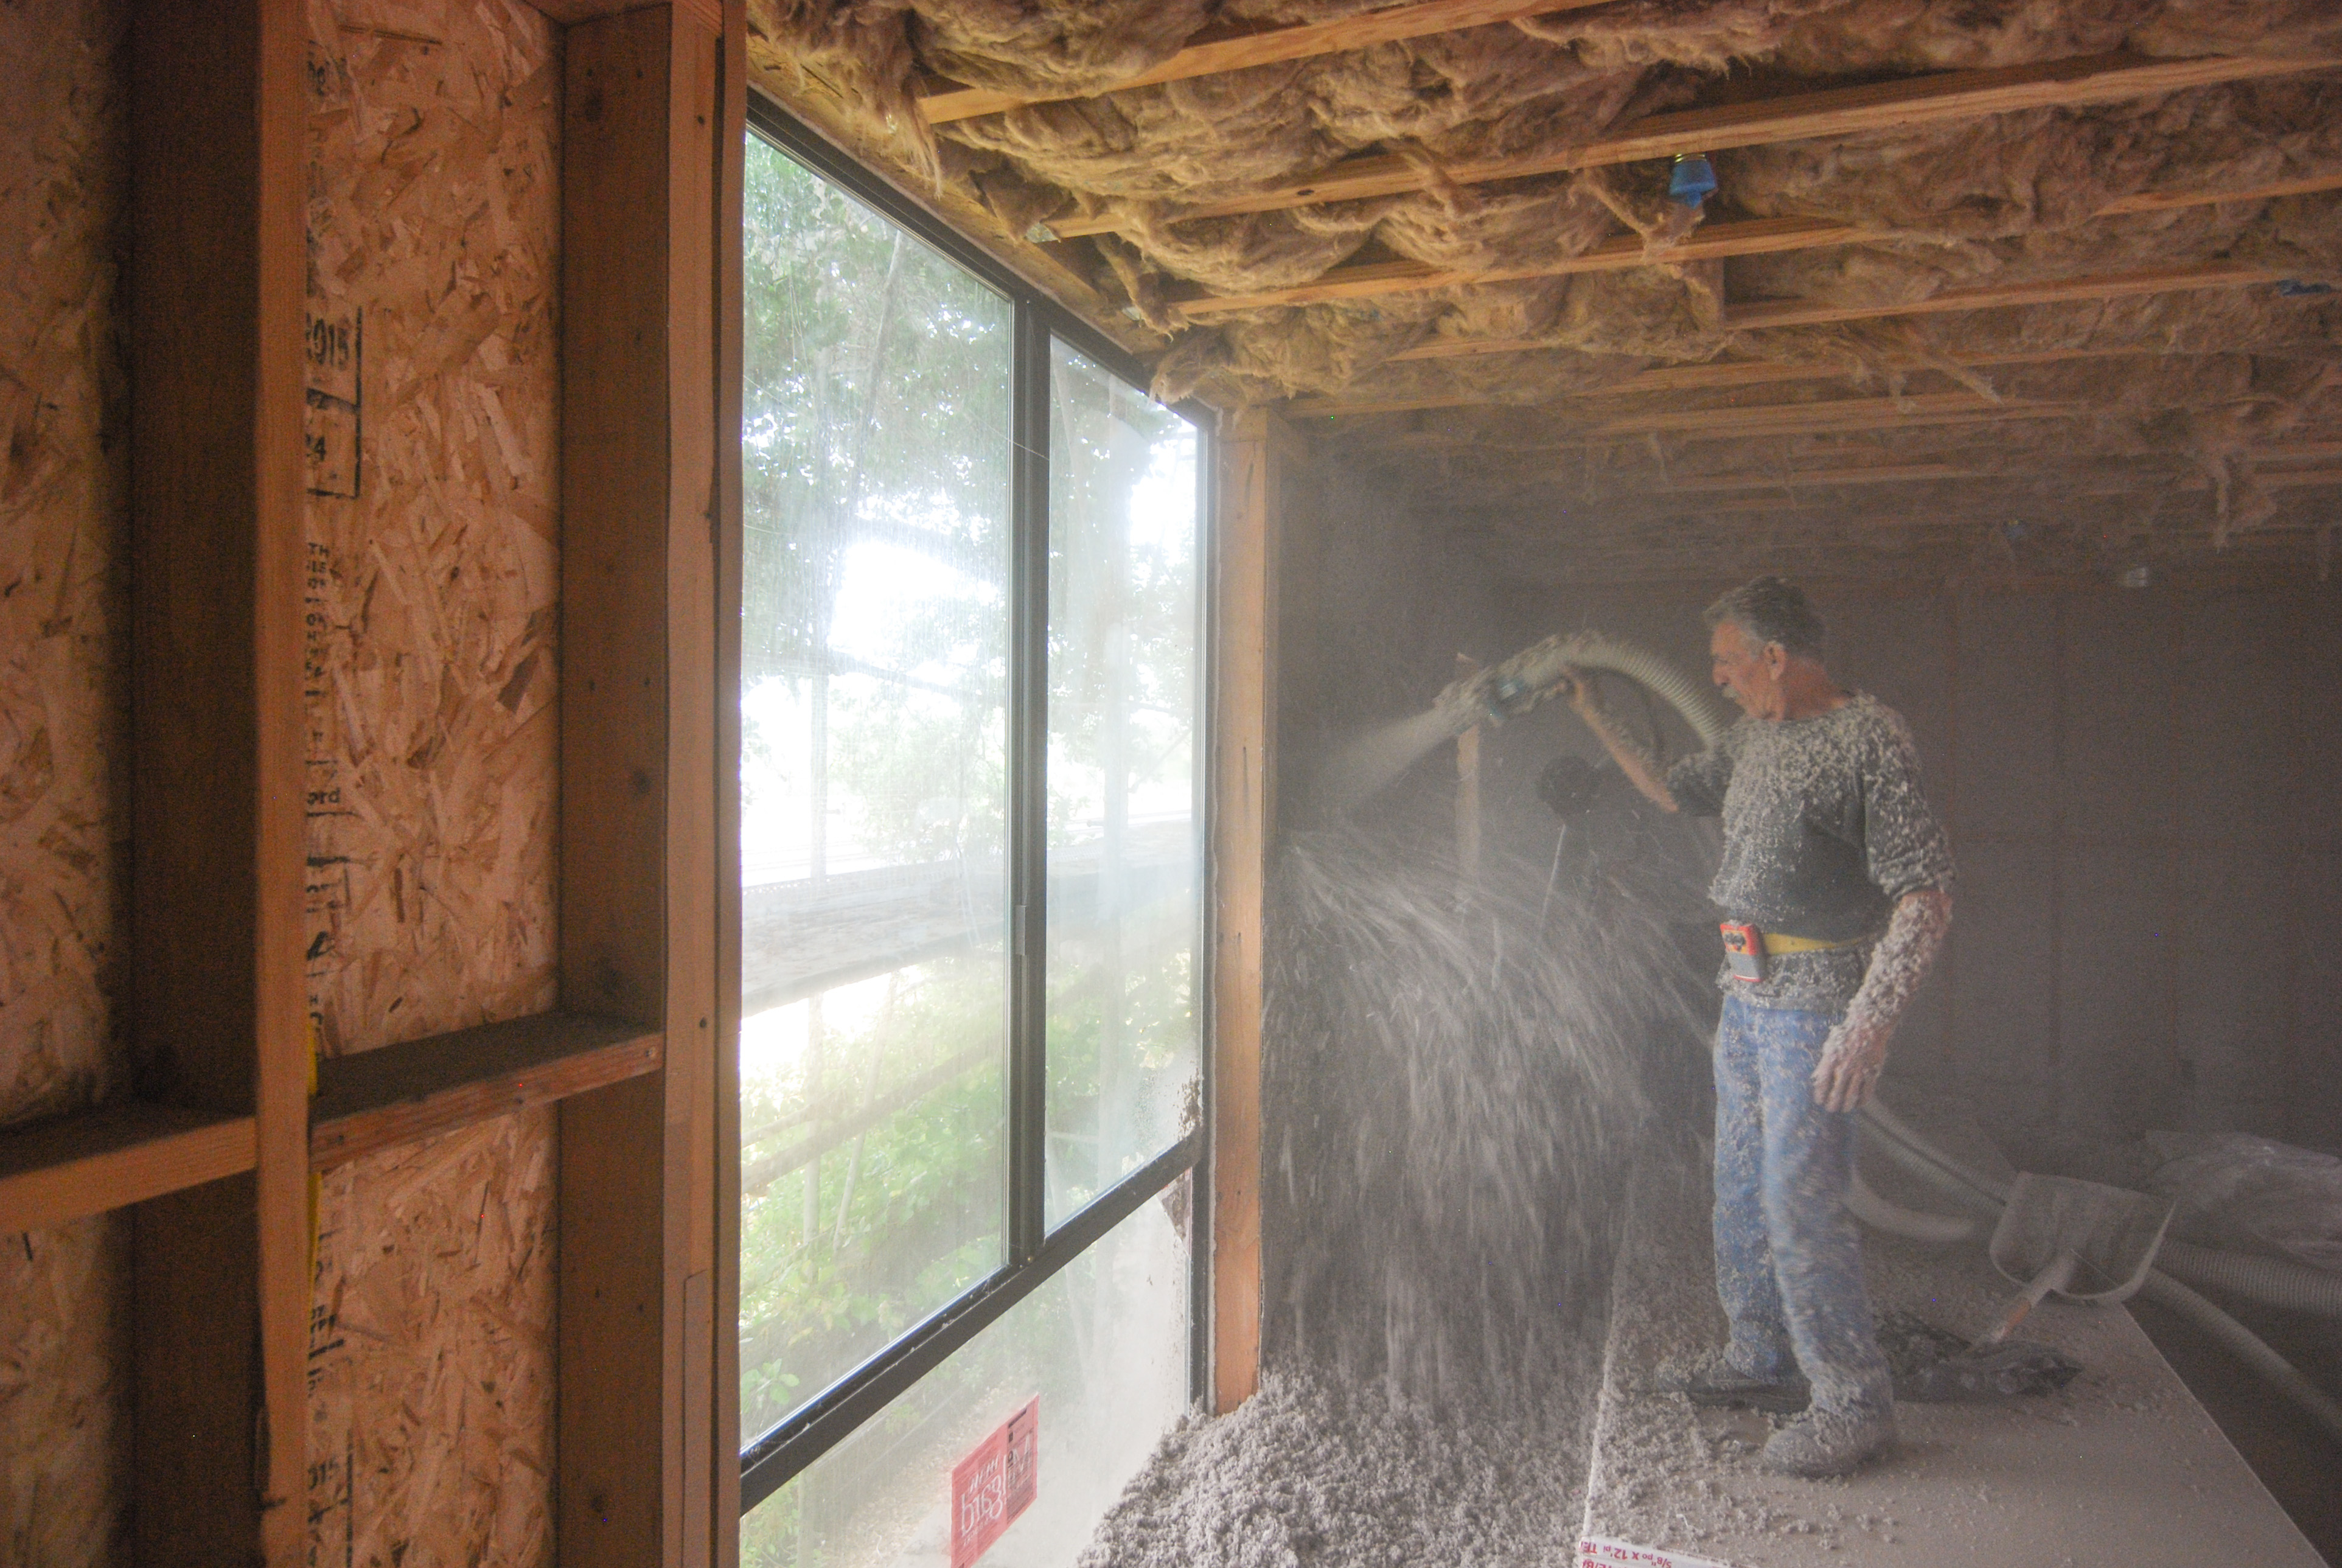
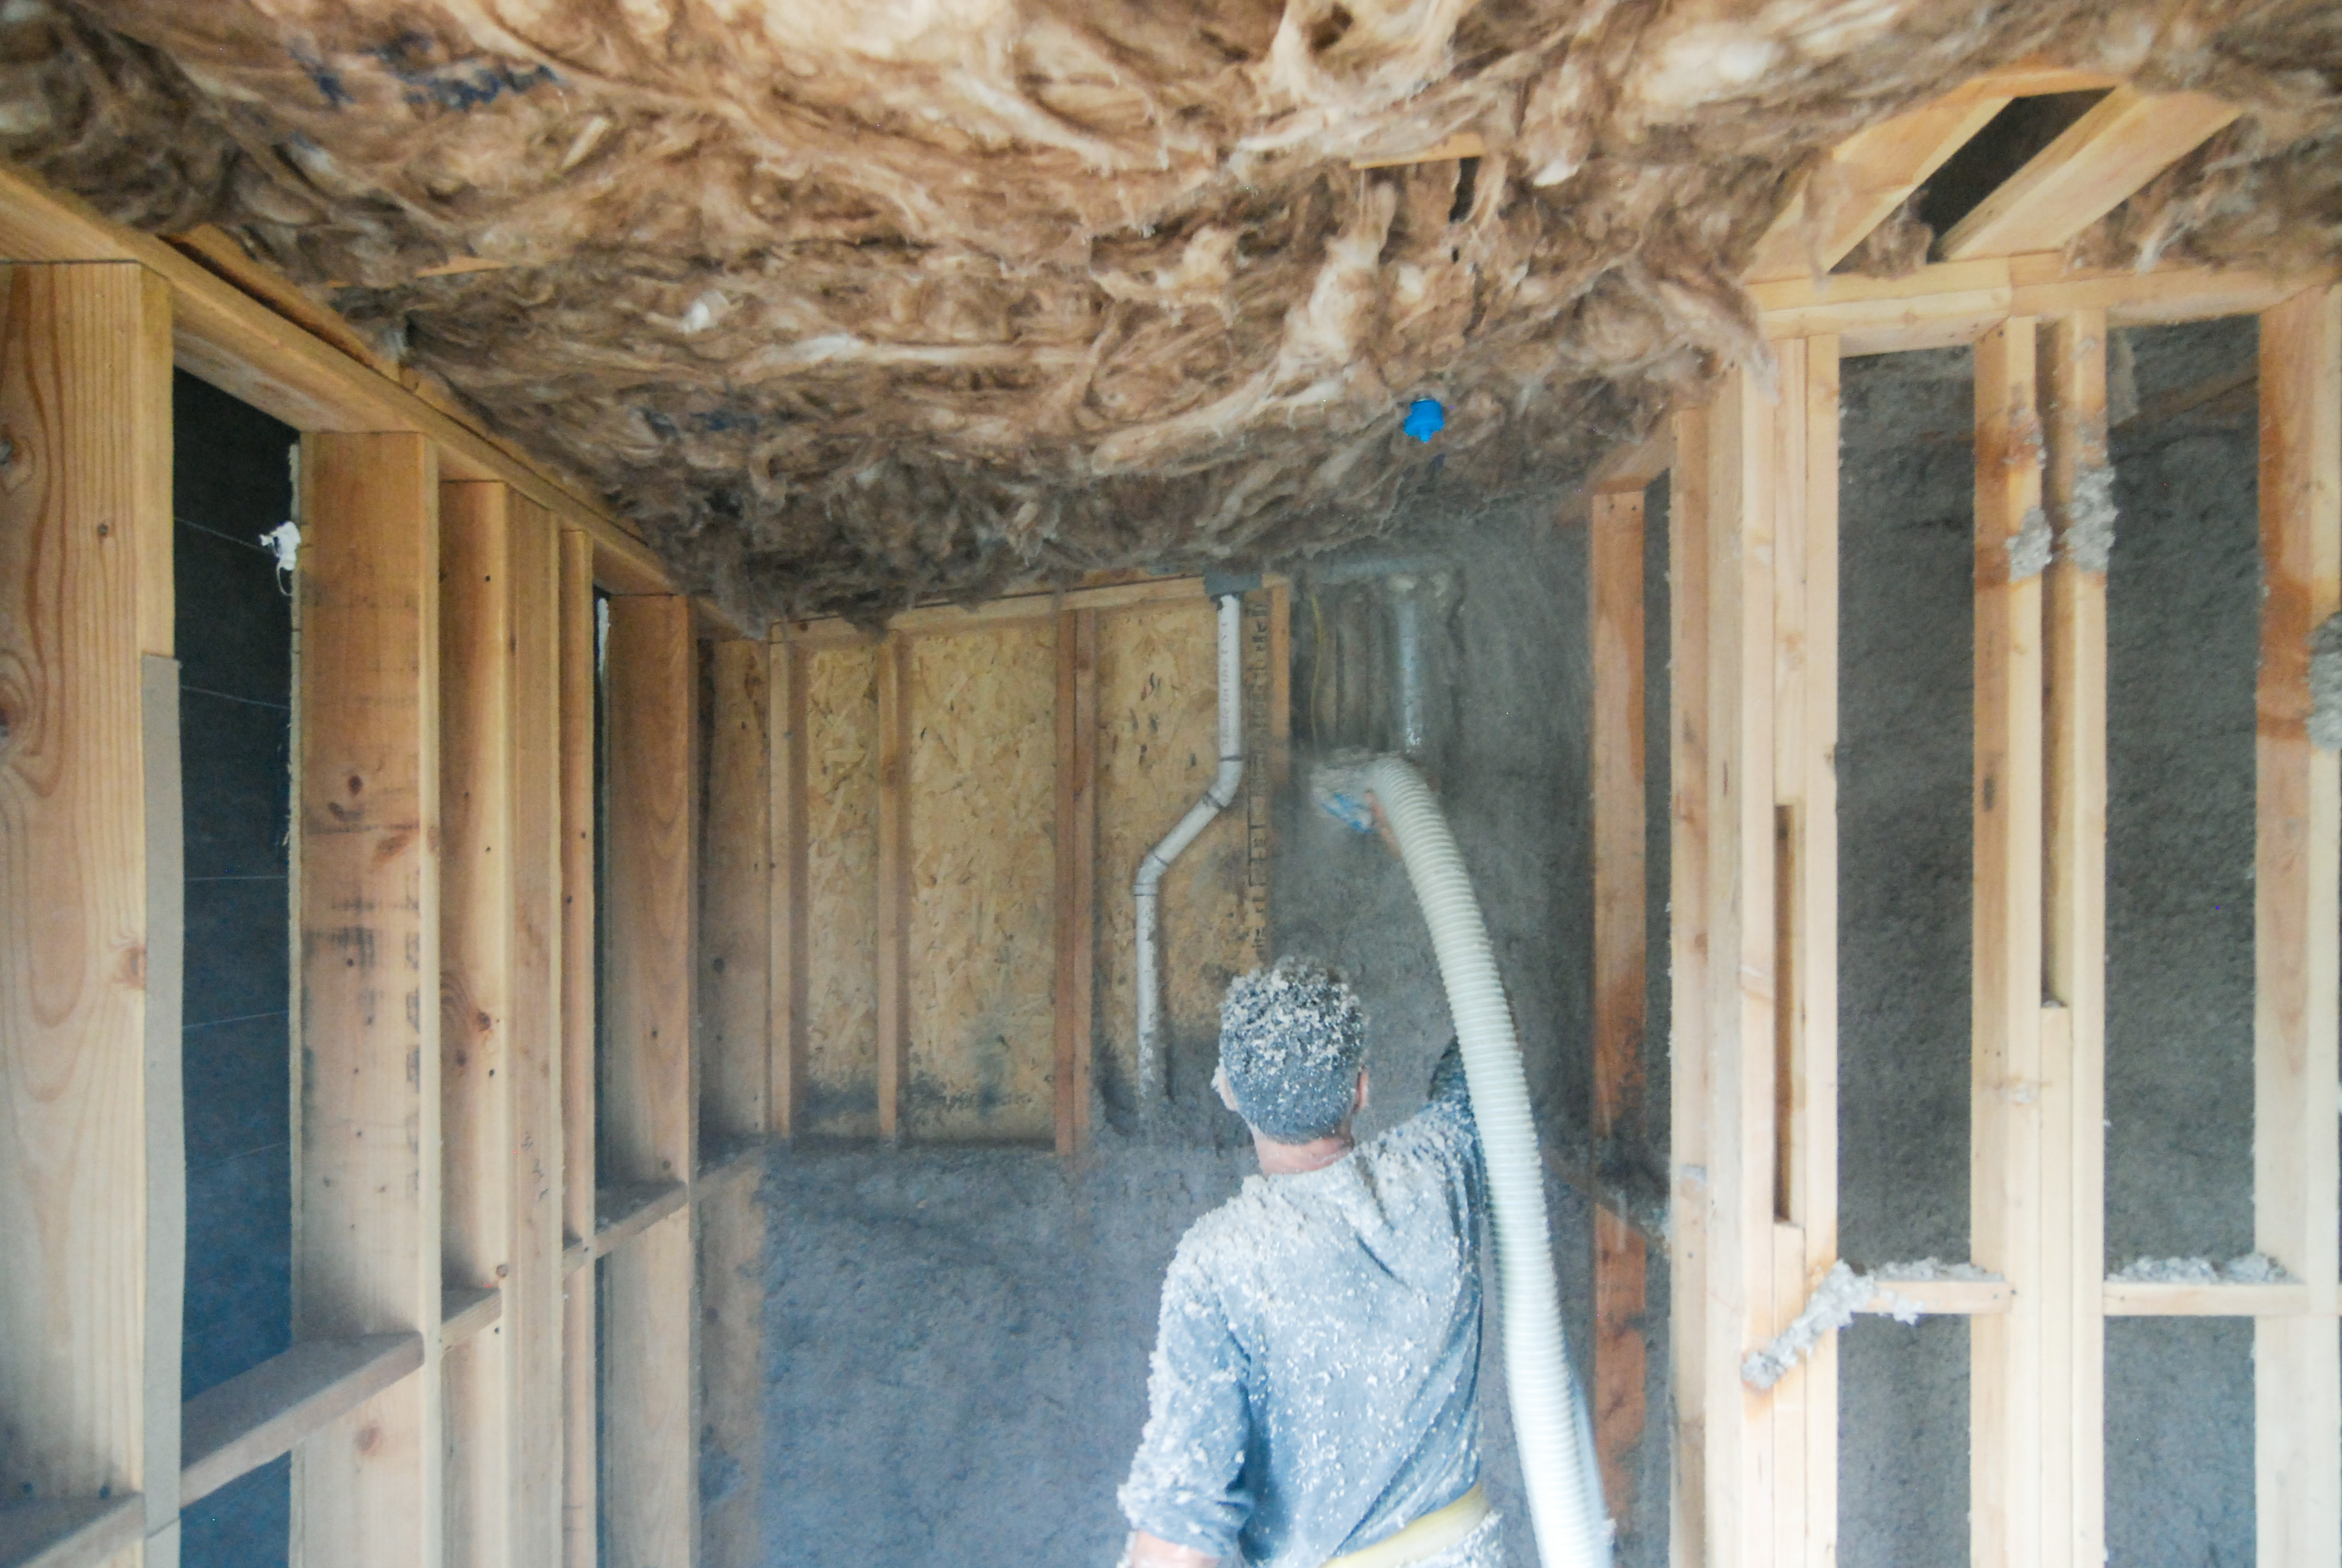
A second hose vacuums up waste and puts is right back into the blower. This means that despite the mess, there is very little waste in the process.
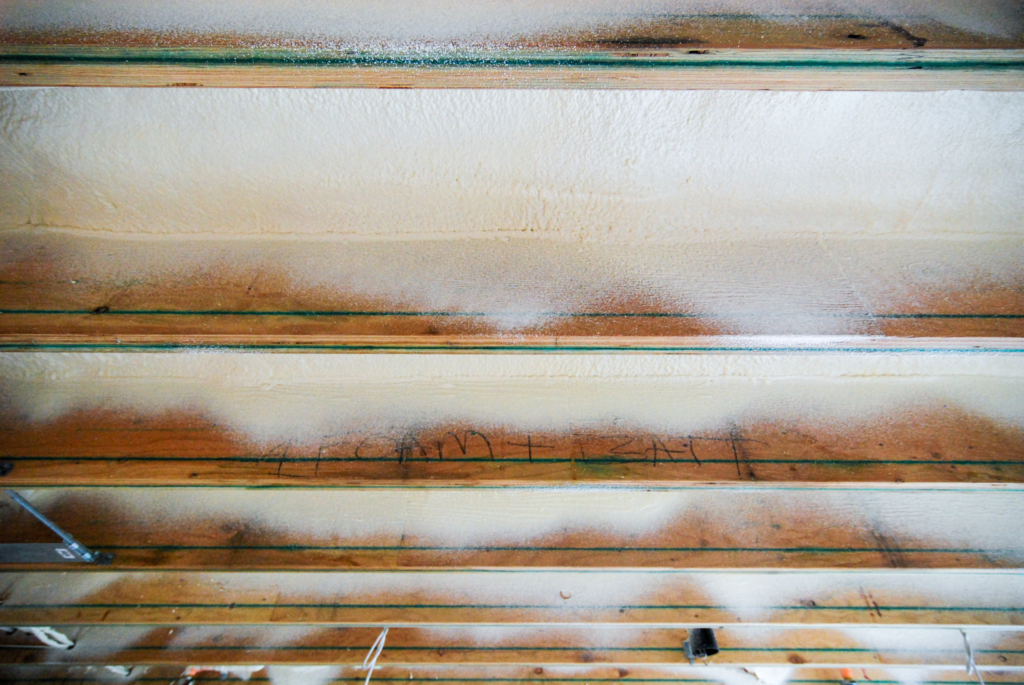
At the end of the blow-in process the face of the wall is scraped flush with the face of studs in preparation for interior finish install. See “before and after” shot below. Hope we didn’t need to make any more adjustments in those line-sets.
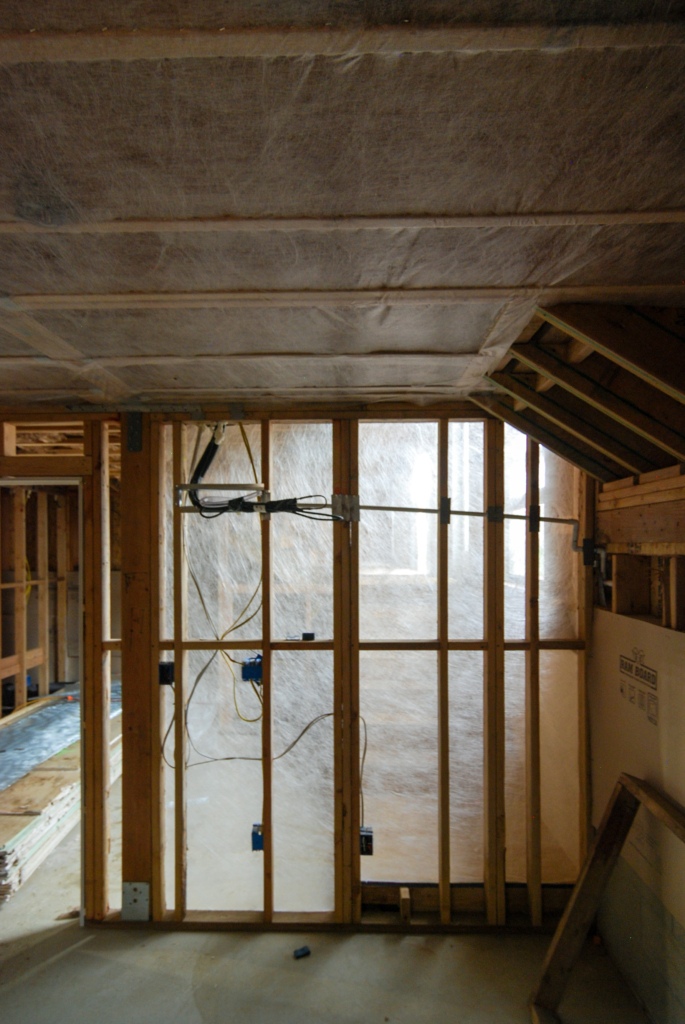
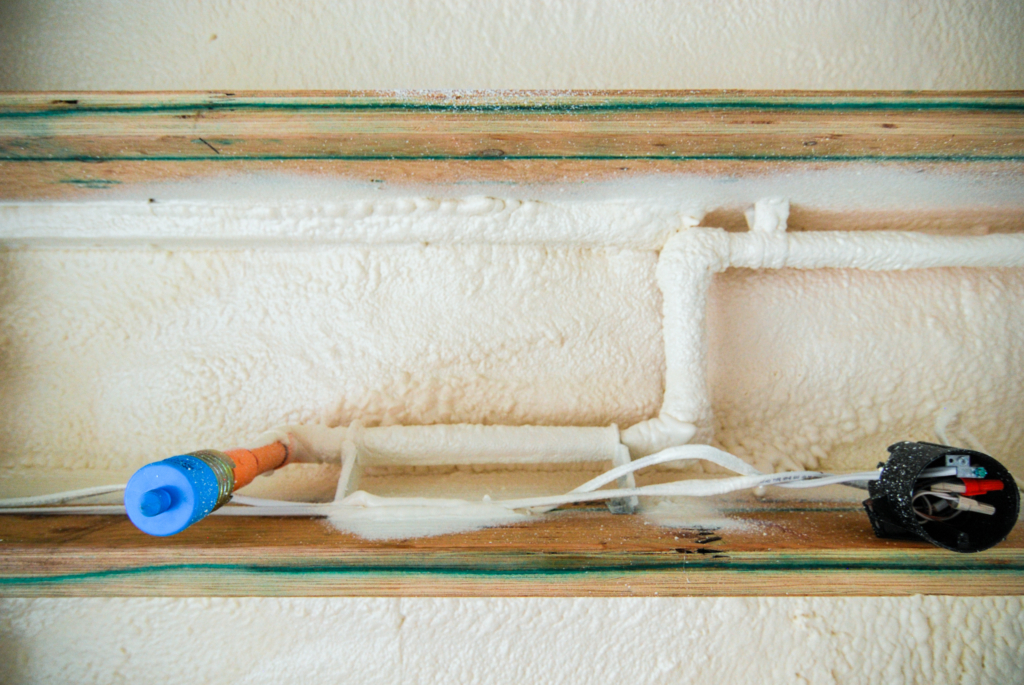
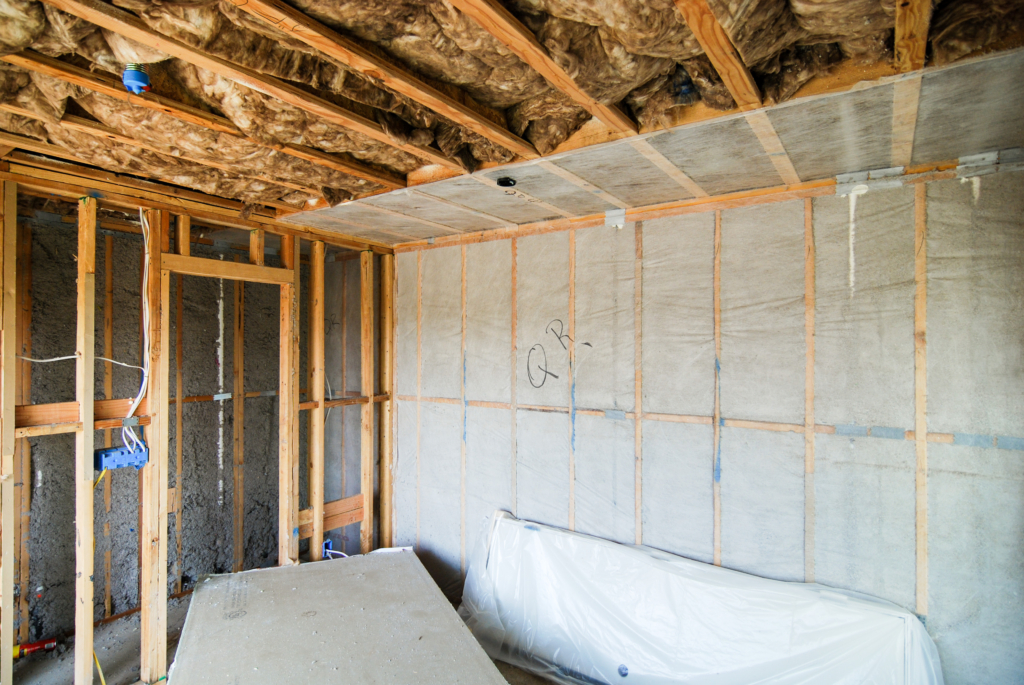
Spray Foam
 The main reason for using the spray foam is not one of insulation exactly. By code, roofs are required to have minimum levels of free-flow ventilation which allows any condensation in enclosed attic and rafter spaces to be dispersed to the outside. Condensation occurs on the underside of the roof sheathing due to the temperature differential between interior and exterior spaces. This ventilation is quite easy to provide at attic spaces via roof vents due to the larger cavity space available. At flat roofs this open space is often non-existent since joists are typically only 10-12 inches deep. Furthermore, free flow of air rarely occurs across these areas due to framing requirements for full height blocking and flush beams.
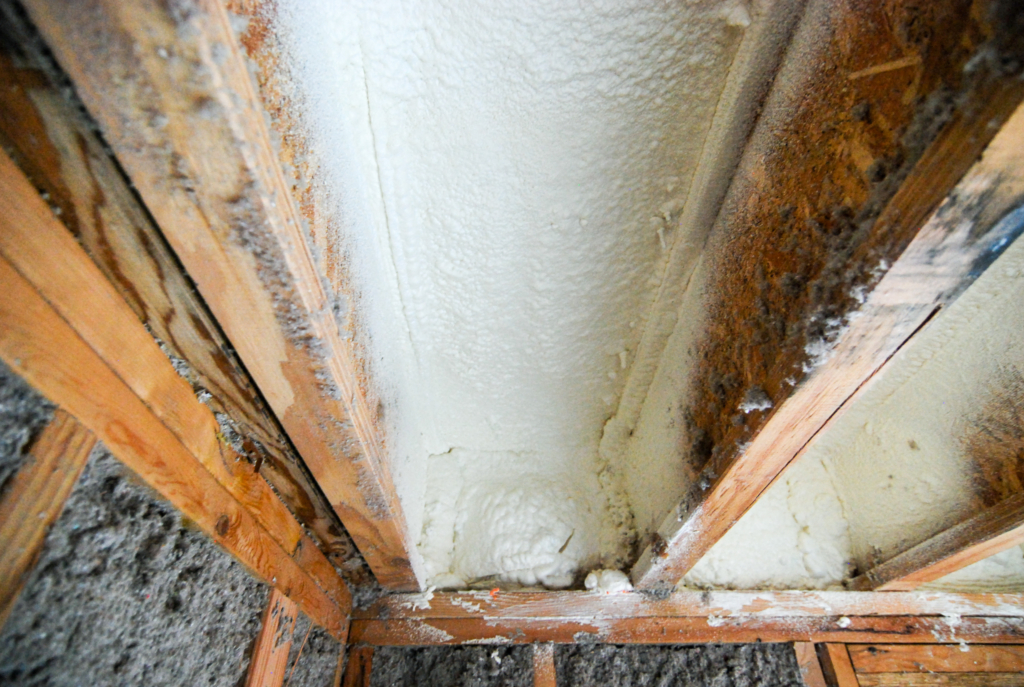
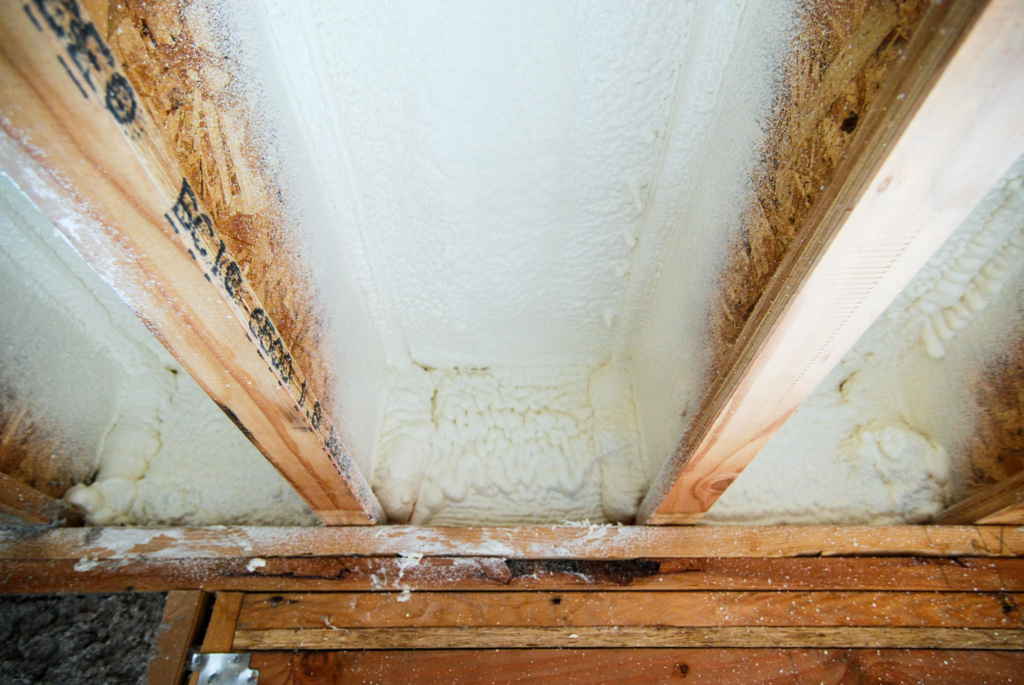
In our structure we have decided to take advantage of an exception in the code which allows us to jettison the ventilation requirement if we properly deal with the condensation problem – here is where the spray foam comes in. The foam that is used is air-impermeable. This means that no air, and therefore no moisture within that air, can pass through the foam. By applying a 1″ thick layer of foam at the underside of the roof sheathing we effectively move the dew point from the underside of the sheathing to within the foam. Since the foam is air-impermeable, presto, no more condensation. We only need 1″ due to our mild climate. In harsher climates this depth is increased to 2-3″ or more. If you’re still reading at this point, I’m impressed. If you glazed over a while back, well, just know that modern building science is hard at work between the roof rafters.
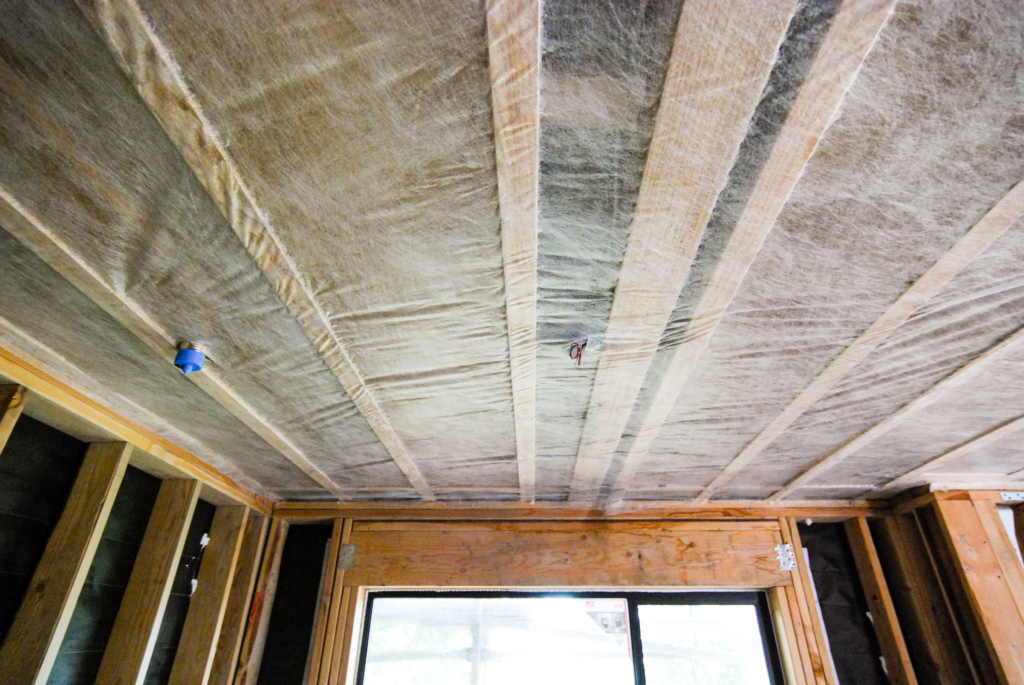
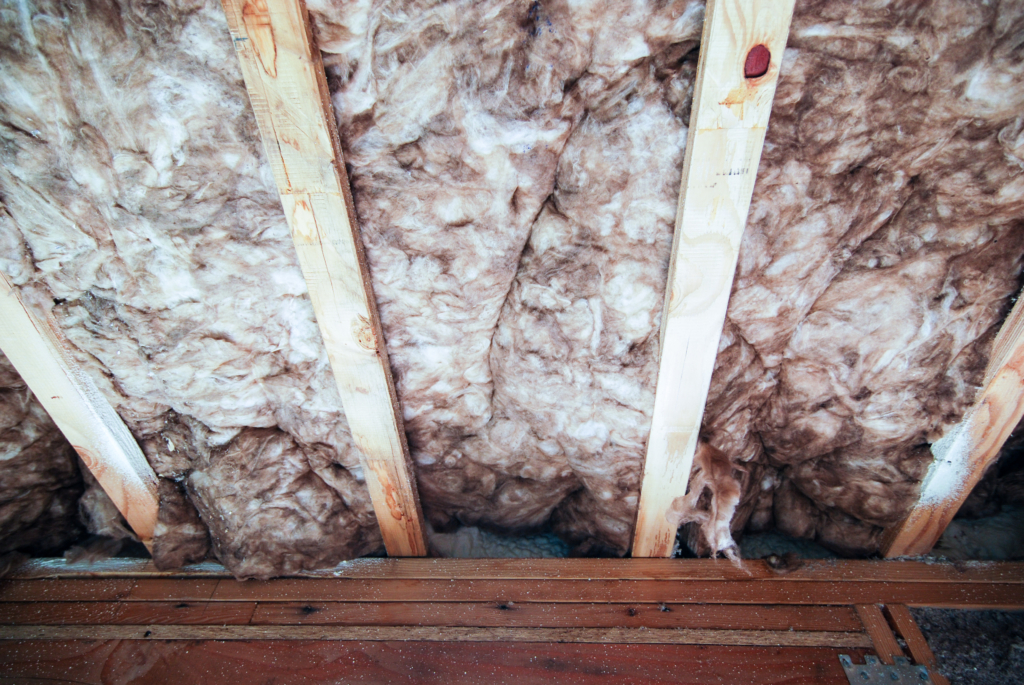
Batts
Traditional insulating batts fill the remaining cavity below the spray foam. They are also used at the less noise critical locations of the attic and floor over the carport. The brand we used was EcoBatt.
Overall, I’m very please with the value we will be getting out of the money spent on insulation. Every space is notably quieter and the overall structure feels incredibly solid. This will, of course, only increase once wall finishes go on, but the difference between open framing and framing with insulation is the most significant shift that occurs during the construction process. Anecdotal evidence: it is now very easy to lose track of someone in our relatively small building. Sound no longer travels directly through the walls, but has to weave its way down hallways and through open windows and doors. A bit inconvenient on the job site, but a great condition to have for the soon to be occupied living spaces.